Losing track of digital photos is more common than people realize. Years of downloads, transfers, and edits can scatter memories across hidden folders. That’s why many users start asking how does Photostick work and whether it can simplify photo backup without technical stress.
PhotoStick works by scanning your device for supported photo and video files, skipping duplicates, and copying everything onto a USB drive. It helps you gather scattered media from different folders into one organized backup. Keep reading to understand each step clearly and know what to expect during the backup process.
How Does PhotoStick Work? (Step by Step)
In basic terms, PhotoStick is a USB storage device with preloaded scanning software that searches your computer for supported media files and creates a backup copy on the drive. It does not delete or modify your original files unless you manually choose to do so.

But there’s more happening behind the scenes. Below is a complete, step-by-step breakdown of how PhotoStick works, what it scans, how it handles duplicates, and what you can realistically expect when using it.
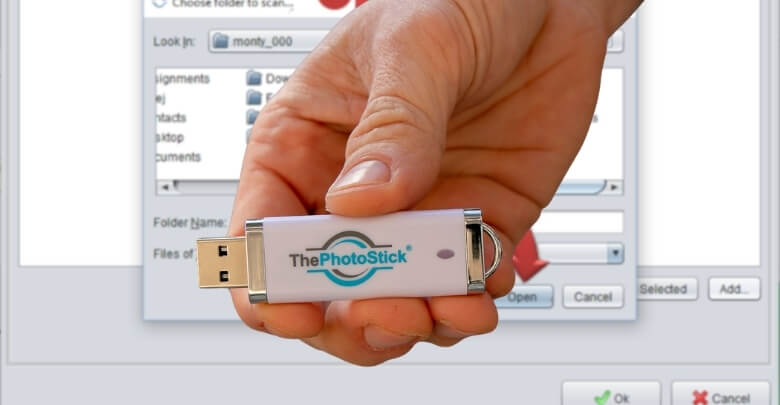
Step 1: Plug the PhotoStick Into Your Computer
PhotoStick looks like a regular USB flash drive, but it includes preloaded backup software.
- Insert it into a USB port on your Windows or Mac computer.
- In most cases, the program launches automatically.
- If it doesn’t auto-open, simply open the drive and click the application file.
Unlike traditional backup software, you usually don’t need to install anything. The program runs directly from the device itself, which makes the setup process simple and beginner-friendly.
Step 2: Launch the Built-In Scanning Software
Once opened, you’ll see a clean and simple interface. The design is intentionally minimal so that even non-technical users can operate it easily. At this stage, you can:
- Start a quick scan (recommended for most users)
- Adjust advanced settings (optional)
- Select specific folders to scan
- Choose which file types to include
Most users simply click the main “Go” button to begin the automated scan.
Step 3: The Scanning Process Begins
This is where the core functionality happens. PhotoStick scans your computer for supported file types, typically including:
- JPG, JPEG, PNG
- GIF
- MOV, MP4, AVI
- Other common image and video formats
Instead of relying on folder names like “Pictures” or “Downloads,” it searches by file extension. That means even photos buried in old or forgotten folders can be detected.
For example, if a photo was saved years ago in a random subfolder, PhotoStick can still identify it because it scans based on file format rather than folder organization.
Depending on your computer’s storage size and the number of files, this scan can take anywhere from a few minutes to several hours. Larger drives naturally take longer.
Step 4: Duplicate Detection and Filtering
One key feature of PhotoStick is its duplicate detection system. During the scan, it:
- Identifies identical files
- Skips duplicates (based on your selected settings)
- Prevents unnecessary storage use
This helps maximize available space on the device and reduces clutter. However, slight file variations (such as edited versions or renamed files) may still be saved as separate items.
This duplicate filtering feature is frequently mentioned in many ThePhotoStick review discussions because it simplifies what would otherwise be a manual sorting process.
Step 5: Files Are Copied to the Device
After scanning is complete:
- Selected files are copied onto the PhotoStick
- Your original files remain untouched on your computer
- No files are deleted or moved automatically
The device becomes a portable backup library of your photos and videos. Once finished, you can safely eject the device and store it in a secure location. Many users choose to keep it in a drawer, safe box, or another protected place to prevent accidental damage.
The Way PhotoStick Finds Hidden or Lost Photos
Many people believe their photos are “lost” when, in reality, the files are still on the computer, just buried inside unexpected folders. Over time, images get scattered across downloads, messaging app directories, external imports, desktop folders, and old backup locations. Manually searching through each folder can be overwhelming.
PhotoStick works differently from normal browsing. Instead of relying on visible folder names, it scans your device at the file-structure level and looks specifically for supported media file extensions.
Here’s how that process works behind the scenes:
- Scans the primary internal drive (such as C: on Windows or Macintosh HD on Mac)
- Moves through subfolders and nested directories automatically
- Searches by file extensions like .JPG, .JPEG, .PNG, .GIF, .MP4, and .MOV
- Finds media files no matter how deeply they’re stored
This method is important because many photos aren’t saved in the obvious “Pictures” folder. For example:
- Images downloaded from email attachments may sit inside a temporary downloads directory.
- Photos received via messaging apps may be saved in hidden application folders.
- Pictures transferred from cameras or SD cards might remain inside old import folders.
- Edited images could be saved in separate export directories.
Instead of requiring you to remember where each file was stored, PhotoStick scans broadly across the selected drive and compiles supported media into one location.
This Feels Like “Finding Lost Photos”
From a technical standpoint, PhotoStick is not recovering deleted files. It does not perform deep data recovery like forensic software. Instead, it locates existing files that are still stored on the device but are difficult to find manually.
For many users, this creates the feeling that lost photos have been rediscovered, when in reality, they were simply hidden in overlooked directories.
Does It Scan Everything Automatically?
By default, the software scans the main drive. However, users can adjust settings to:
- Limit the scan to specific folders
- Expand file type selection
- Exclude certain directories
This flexibility helps control scan time and storage usage while still maintaining broad file detection.
How Long Does the Deep Scan Take?
Scan duration depends on:
- Total storage size of the drive
- Number of files stored
- Device performance
- Selected scan settings
A smaller drive may complete in minutes, while a heavily used computer with years of stored media could take several hours.
In practical terms, PhotoStick doesn’t magically recover deleted data, but it does efficiently locate scattered media files that would otherwise remain buried inside your system. That’s what makes the scanning process feel powerful and convenient.
What Types of Files Can PhotoStick Detect and Save?
Before using PhotoStick, it helps to know exactly what it can back up. PhotoStick is designed to detect and save common photo and video file types from your device, so you can create a simple, organized media backup without manual searching.
Common Image Formats:
- JPG / JPEG
- PNG
- GIF
- BMP
- TIFF (in many cases)
Common Video Formats:
- MP4
- MOV
- AVI
- WMV
Some versions may support additional formats depending on updates and device model. It is not designed to back up full system files, programs, or operating system data. Its purpose is targeted: photos and videos. This specialization is what makes scanning faster compared to copying an entire hard drive.
Does It Search Your Entire Computer or Just Selected Folders?
PhotoStick can scan your whole computer or only selected folders, depending on the settings you choose. By default, it searches your main drive for supported photo and video files, but you can switch to a custom scan to back up specific folders faster.
Default Mode (Full-Drive Scan)
In most cases, the software scans your primary internal drive (for example, C: on Windows or Macintosh HD on Mac). That typically includes:
- Pictures and Photos libraries
- Desktop
- Downloads
- Subfolders inside common directories
- Other locations where supported media file types are stored
Custom Mode (Choose What Gets Scanned)
If you prefer more control, you can:
- Select specific folders (like a single photo album folder)
- Exclude certain areas you don’t want scanned
- Adjust file-type filters to focus only on photos or videos
Why This Setting Matters
Custom scanning is useful when you want:
- Faster scans
- Limited storage on the device
- Backing up only specific albums or years
- More privacy by avoiding unrelated folders
The bigger the scan scope, the longer the scan usually takes, so choosing the right mode can save time and storage.
Can You Use PhotoStick on iPhone or Android Devices?
Yes, but only certain PhotoStick models work with phones, which is why many users get confused. The standard PhotoStick is designed for Windows and Mac computers, while mobile-friendly versions (often sold separately) are built to back up photos and videos from iPhone and Android.
If you’re planning to back up a phone, make sure you choose one of the best photo stick options that specifically supports mobile devices.
What You Typically Need for Mobile Backup
- iPhone: usually requires a companion app and permission to access Photos
- Android: may require granting media/file permissions (and sometimes choosing a file/USB option when prompted)
- Connector compatibility: you may need Lightning (older iPhones) or USB-C (newer iPhones and many Android phones)
How the Mobile Backup Process Usually Works
- Plug the device into your phone
- Open the companion app (if required)
- Allow access to photos/videos
- Start the scan/backup and let it finish
Important Limitation to Know
PhotoStick-style mobile backups generally save media files (photos and videos), not apps, text messages, WhatsApp chats, or full phone system data. Also, if your photos live only in cloud storage, you may need to download them to the device first for a local backup.
Is PhotoStick Safe to Use for Personal Memories?
Before backing up years of family photos and personal videos, it is natural to question safety and data protection. Understanding how PhotoStick handles files can reduce uncertainty. Let’s examine its security and backup behavior in detail.
It Does Not Delete Original Files
PhotoStick is designed to copy supported media files from your device to the USB storage. It does not automatically delete, move, or replace original files, which helps prevent accidental data loss during the backup process.
It Runs Without an Internet Connection
The backup process works locally on your computer or supported mobile device. PhotoStick does not require WiFi or cloud access to scan and copy files, which reduces exposure to online security risks or external data breaches.
It Does Not Automatically Upload Files to the Cloud
Your photos and videos remain stored only on your original device and the PhotoStick itself. There is no automatic syncing to third-party servers, which gives users greater control over personal media privacy.
It Does Not Modify or Compress Your Files
PhotoStick scans by file type and creates a copy of the detected media. It does not alter image resolution, compress video quality, or change file names unless configured through user settings.
Long-term Storage Depends on Proper Handling
Like any USB storage device, durability depends on care and usage habits. Many people question the reliability of flash drive for backup because flash memory can degrade over time if exposed to heat, moisture, or physical damage.
Best Practice Is to Maintain Multiple Backups
Security experts recommend keeping more than one copy of important memories. Storing backups in separate physical locations and periodically checking file accessibility helps ensure long term protection against device failure or accidental damage.
PhotoStick provides a controlled and offline method for copying personal media files, but no single storage device guarantees permanent protection. Combining careful handling with multiple backup copies offers the safest long-term strategy.
PhotoStick vs External Hard Drive: What’s the Real Difference?
Choosing between PhotoStick and an external hard drive depends on how you like to back up files. One focuses on automation for photos and videos, while the other offers flexible storage for nearly anything.
Quick Comparison
| Feature | PhotoStick | External Hard Drive |
| Best for | Photo and video backup | All file types and full backups |
| Setup | Simple, guided software | Manual copy or backup software |
| Automation | Scans for supported media | Depends on what you choose |
| Duplicate handling | Can filter duplicates | Usually manual or third party tools |
| Capacity | Fixed sizes (ex: 64GB, 128GB) | Often much larger (ex: 1TB, 2TB+) |
| Skill level | Beginner-friendly | Basic file management helpful |
| Ideal use case | Quick media backup | Long-term archiving and system backup |
Ease of Use
PhotoStick is designed for simplicity. It typically guides you through scanning and copying photos and videos with minimal setup. External hard drives usually require manual drag and drop or separate backup software, which can feel less beginner-friendly.
Automation and Duplicate Filtering
PhotoStick automatically detects supported media files and can filter duplicates during the backup process. With an external hard drive, you choose what to copy, and duplicates are usually managed manually unless you use additional tools or backup software.
Technical Skill Required
PhotoStick generally works well for non-technical users because it reduces decision-making and file sorting. External hard drives are still easy to use, but you need basic comfort with folders, file locations, and choosing what should be backed up.
Storage Capacity and Flexibility
External hard drives typically offer much larger capacity and can store almost any file type, including full photo libraries, videos, documents, and system backups. PhotoStick devices come in fixed capacities, which may be limiting for large collections.
Which One Fits Your Long-Term Backup Plan?
An external hard drive is usually better if you want full system backups, large-scale archiving, or professional workflows. PhotoStick may be better if your goal is quick photo and video backup with less manual work. The right choice depends on your storage needs and comfort level.
Frequently Asked Questions About PhotoStick
Before buying or using a PhotoStick device, many users have additional practical questions beyond basic setup and safety. Below are commonly searched questions that help clarify expectations, performance, compatibility, and real-world usage scenarios.
How Long Does Photostick Last?
PhotoStick lifespan depends on usage frequency and storage conditions. Like most USB flash drives, it can last several years if handled properly. Avoid heat, moisture, and physical damage to extend durability and preserve stored files.
Can Photostick Transfer Files Between Computers?
Yes. Since it functions as a USB storage device, you can plug it into another compatible computer to access, copy, or move saved files. It works similarly to a standard flash drive once the backup is complete.
Does Photostick Require Software Updates?
Most versions run the built-in software directly from the device without mandatory updates. However, newer models or mobile-compatible versions may release companion app updates for improved compatibility and performance.
Can Photostick Back Up External Hard Drives?
PhotoStick can scan external drives if they are connected to your computer during the scanning process. You may need to select the external drive manually within scan settings to include those files.
What Happens If Photostick Runs Out Of Storage Space?
If the device becomes full, the scan will stop saving additional files. You can either delete unnecessary files from the device or upgrade to a higher-capacity version to continue backing up more media.
Does Photostick Work With Older Computers?
Most versions support common Windows and macOS systems. However, compatibility may depend on USB port type and operating system version. Always check system requirements before purchasing.
Can Photostick Recover Permanently Deleted Files?
No. PhotoStick is not a data recovery tool. It scans for existing files stored on your device. If files have been permanently deleted and overwritten, separate recovery software would be required.
Conclusion
Understanding how does Photostick work helps you decide whether it fits your backup needs. The device scans your computer for supported photo and video files, skips duplicates, and copies everything to portable storage without deleting the originals.
While it simplifies the backup process, smart storage habits still matter for long-term protection. Pairing PhotoStick with a second backup method, such as cloud storage or an external hard drive, adds redundancy and reduces the risk of losing memories from device failure, accidental deletion, or account issues.